Now for the final post on inversive geometry! I’ve been generating some fascinating images, and I’d like to share a bit about how I make them.
In order to create such images in Mathematica, you need to go beyond the geometrical definition of inversion and use coordinate geometry. Let’s take a moment to see how to do this.
Recall that P′, the inverse point of P, is that point on a ray drawn from the origin through P such that
![[OP]\cdot[OP']=1,](https://s0.wp.com/latex.php?latex=%5BOP%5D%5Ccdot%5BOP%27%5D%3D1%2C&bg=ffffff&fg=333333&s=0&c=20201002)
where ![[AB]](https://s0.wp.com/latex.php?latex=%5BAB%5D&bg=ffffff&fg=333333&s=0&c=20201002)
Now suppose that the point P has Cartesian coordinates 


This is just a matter of a little algebra; the result is

What this means is that if you have an equation of a curve in terms of 


Let’s illustrate with a simple example — in general, the computer will be doing all the work, so we won’t need to actually do the algebra in practice. We’ll look at the line 
Making the substitution just discussed, we get the equation

which may be written (after completing the square) in the form

It is not hard to see that this is in fact a circle which passes through the point
Now we need to add one more step. In the definition of an inverse point, we had the point 


Let’s proceed incrementally. Beginning with a point 


Finally, translate back:

This is now the inverse of the point 

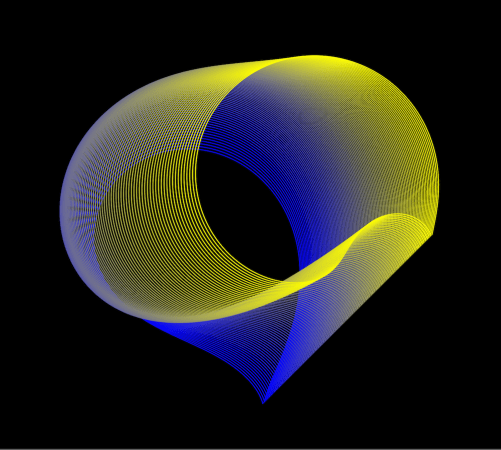
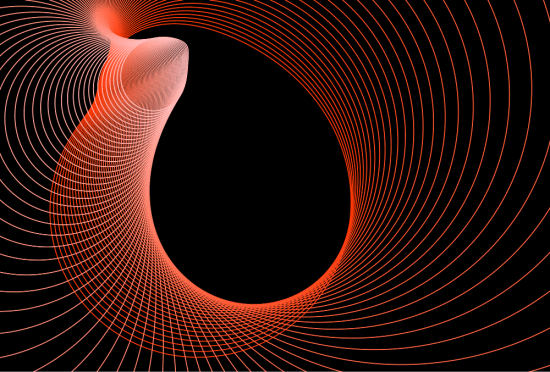
So what you see in the above image is several copies of the parabola 


Of course there is another perspective on accomplishing the same task — just shift the parabolas first, invert about the origin, and then shift back. This is geometrically equivalent (and the algebra is the same); it just depends on how you want to look at it.
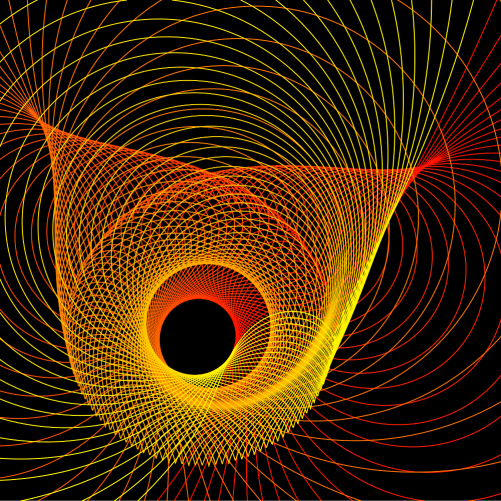
Here is another image creating by inverting the parabola
And while we’re on the subject of inverting parabolas, let’s take a moment to discuss the cardioid example we looked at in our last conversation about inversion:
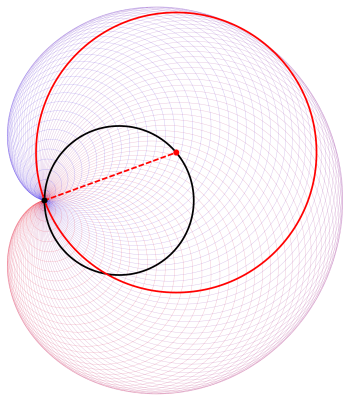
To prove that this construction of circles actually yields a cardioid, the trick is to take the inverse of a parabola about its focus. If you do this, the tangent lines of the parabola will then invert to circles tangent to a cardioid. I won’t go into all the details here, but I’ll outline how the proof goes using the following diagram.
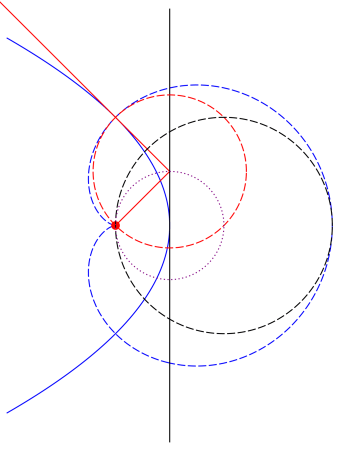
Draw a line (shown in black) tangent to the blue parabola at its vertex; the inverse curves are shown in the same color, but dashed. Note that the black circle must be tangent to the blue cardioid since the inverse black line is tangent to the inverse parabola.
The small red disk is the focus of the parabola. Key to the proof is the property of the parabola that if you draw a line from the focus to a point on the black line and then bounce off at a right angle (the red lines), the resulting line is tangent to the parabola. So the inverse of this line — the red dashed circle — must be tangent to the cardioid.
Since perpendicularity is preserved and the line from the focus inverts to itself (since we’re inverting about the focus), the red circle must be perpendicular to this line — meaning that the line from the focus in fact contains a diameter, and hence the center, of the red circle. Then using properties of circles, you can show that all centers of circles formed in this way lie on a circle (shown dotted in purple) which is half the size of the black circle. I’ll leave the details to you….
Finally, I’d like to show a few examples of using the other conic sections. Here is an image with 80 inversions of an ellipse around centers which lie on a line segment.
And here is an example of 100 hyperbolas inverted around centers which lie on a line segment. Since the tails of the branches of a hyperbola all go to infinity, they all meet at the same point when inverted.

So now you know how to work with geometrical inversion from an algebraic standpoint. I hope seeing some of the fascinating images you can create will inspire you to try creating some yourself!

One thought on “Still more on: What is…Inversive Geometry?”