The Joy of Ink I

Think twice about becoming a digital artist.

While at my local print shop — again being frustrated at trying to get colors to print correctly — Xander (one of the printers who works there) casually mentioned that digital art as seen on a computer and digital art as seen in a print are two different media.  (By the way, the shop is Autumn Express in the Mission District, San Francisco.  Go there!)

I had never thought about digital art in that way before.  The idea prompted me to write a few blog posts about my experience with light and pigment.  It’s been a bumpy journey — but ultimately rewarding.  I hope that writing about my successes and challenges might make it a little easier for the next aspiring digital artist….

In the beginning, I thought it would be easy.  For my first solo exhibition (when I was teaching in Princeton, NJ), my art teacher’s friend and colleague generously printed my images for me, and frankly, they were perfect.  (Thanks, Bryan!  By the way, Bryan does some amazing work — check out his website here.)

So I thought, “Hey, Bryan got it right the first time.  No problem!”  But, as it turns out, the typical print shop printer is, well, not Bryan.  There’s an art to printing, and some printers are more artisitic than others.

For example, when I was in Florida in Fall 2014, I designed some greeting cards to sell at a gallery for local artists.  I needed to find somewhere close by where I could get them printed relatively inexpensively — I wanted to make a little money out of the adventure.  I took my designs to a local shop, printed them out, and they looked horrible.  Colors washed out and muted — bland.  There was no one who worked there who knew much about color, so I was stuck.  I gave up on this project.

I had better luck with Ron (of No Naked Walls in Port Richey, FL).  He had a real interest in printing and photography — even had a collection of some very old cameras.  And he had just bought a brand spanking new printer (not sure how many thousands of dollars it cost), and enjoyed playing around with it.

Gamut is the issue.  A color gamut is the range of colors you can produce with your device.  A computer screen uses red, green, and blue phosphors which are excited by electron beams to generate colors (see a simple explanation here).  Using light to create color sensations is referred to as additive color.  A printer, on the other hand, mixes pigments — usually cyan, magenta, yellow, and black — to create color, which is known as subtractive color.

Now this isn’t meant to be an in-depth tutorial on color (that would take far too many posts) — but the bottom line is that the gamut of colors produced by your color monitor is not the same as the gamut of colors produced by your local printer.  (And if you want to know more, just google any of the terms in this brief discussion and you’ll find lots more to read.)

And it gets more problematic when you realize that different monitors may  also have different color gamuts.  Monitors may be calibrated in many ways, each rendering coloring differently.  So what looks just right on one laptop may look slightly off on a different one.

But Ron was willing to work with me.  He’d take my jpeg, upload it into his version of Photoshop (again, differences!), and then print it out — and it wouldn’t look like it did on my computer screen.  We’d work back and forth — testing small sections of a large print, changing the colors slightly, then printing again — until we got something that looked good to me.

What you’ll find out is that not every printer knows all that much about color, and not every printer is willing to work with you.  The first printer I went to in San Francisco, Photoworks on Market St., really wasn’t all that helpful.

I was hopeful about an online printer — ProDPI — I heard about from a colleague at a conference.  He had good luck with having prints made and shipped directly to clients.  I wasn’t so lucky.  When I had samples printed and they were too yellow, I was (after many email exchanges) politely informed that because they dealt mainly with portraits, their printers were calibrated to print colors a little warmer, and no, they did not intend to modify their profile any time soon.

I did try adjusting the colors and printing a second set of samples, and they were also not quite right.  I suppose I could have continued this back-and-forth with waiting for samples to arrive in the mail, tweaking them, and repeating the cycle — but I didn’t want to do this with every image I wanted to print.  So I gave up on ProDPI.

How I found Autumn Express was completely serendipitous.  I needed to get some prints made for an exhibition at a big national mathematics conference, and I wasn’t having any luck.  I was visiting friends over our winter break, and I even frantically called to see if we could visit some local print shops while I was traveling.

But some of my housemates have a video game company, and they get stuff printed all the time.  I happened to ask JJ where they got their material printed, and the rest is, well, history.

I never knew finding a good printer would be so difficult.  I needed to understand color gamuts.  But more importantly, I learned that printing is not just a matter of pushing a few buttons, but is really an art.  Bryan made it look so easy.  But it’s not.

Next week, I’ll talk about a few specifics — settings in Photoshop, for example.  And I’ll say a little more about how what you see on your computer screen might be rather deceiving.  But then you’re on your own….

International Dodecahedron Day 2016!

I have always been fascinated by geometry in three dimensions.

Day028tRp_52-3-5

I can still remember an eighth-grade project in my algebra class where we built polyhedra — mine was a white icosahedron with smaller, orange equilateral triangles connecting the midpoints of the edges.  This is what an icosahedron looks like:

Day028Fig24b

I even naively tried to build an icosahedron by trying to glue twenty regular tetrahedra (triangular pyramids) together, thinking that if you took a face of the icosahedron and connected its vertices to the center of the polyhedron, the result would be a regular tetrahedron. It’s pretty close — but not quite there. I wondered why my model didn’t close up.

Next, I remember walking down the aisles of the mathematics and science library at Carnegie Mellon, looking at mathematical “picture books.” I don’t know how many times I checked out Polyhedron Models by Magnus Wenninger, just looking at all the photos of the paper polyhedron models, flipping back and forth between them, trying to see how they were related to each other.

With each model, there was a net — a set of connected polygons you could use to create the model. The net you see here is for a polyhedron called the rhombic dodecahedron.  I wondered how you could make each net.  Day028rhdodeca
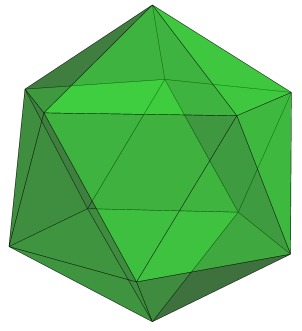
Later, I found out that there were lots of data published about various lengths and angles in different polyhedra — but those data were often numerical approximations, not exact values. What were the exact values?

These questions stimulated me to study more deeply — using tools such as coordinate geometry, linear algebra, and spherical trigonometry. I eventually answered many of the questions I asked so far, but of course generated many more questions, which were usually more difficult to answer.

Once I finished graduate school, I started writing a book on the mathematics of polyhedra, and eventually used it in a university-level geometry course. As I gained experience, I was asked to help design a senior capstone course for a local high school which used my text. A few years into this, my colleagues Todd Klauser and Sandy Spalt-Fulte helped organize a project where students in this senior course — as well as Todd’s other geometry students — went to a local middle school and taught the younger students how to make three-dimensional models of dodecahedra. And so Dodecahedron Day was born.

Dodecahedron Day is celebrated on December 5 of each year (for the 12 pentagons on a dodecahedron), and was first celebrated in 2005. Perhaps it’s a bit early in the year to talk about it — but just yesterday, I ran a booth at a fundraiser for the San Francisco Math Circle where we had students build three-dimensional models of different types of dodecahedra.

Day028ZOE_0015_1

What I love about this type of activity is how much the students love it as well.  The dodecahedron you see here was created by a young girl of about eight or nine years old — she worked painstakingly with her glue stick for close to an hour getting it together.  Her focus was intense.  No, it wasn’t perfect.  But it was hers.

Interestingly, the parents of several students also built models — and took home nets to build more!  And one of my student assistants, Simon, got very creative with decorating a net for a small stellated dodecahedron.

Day028ZOE_0019_1

Students have fun building polyhedra. Frankly, I think mathematical activities which are just fun are very useful activities — improving students’ attitudes about math is really critical to their success. Students perform better in subjects they like.

But in addition to being fun, building models requires focus and attention to detail, and also develops spatial abilities. In fact, an undergraduate in my 3D geometry course who later went on to get a Ph.D. in chemistry told me that my geometry course helped her in graduate school more than any of her chemistry courses! Just think about the geometry inherent in studying orbitals.

Over the years, I’ve developed many activities for Dodecahedron Day, and include some on the Day’s website www.dodecahedronday.org. For younger students, I’ve created activities involving pentominoes, since there are 12 pentominoes, each made up of five connected unit squares (keeping with the 12/5 theme). I’m sure others have and will continue to develop different activities — the important thing is that students take a day to truly enjoy doing geometry.

One thing I do insist upon, though, is that teachers don’t create a contest out of who makes the “best” dodecahedron. There’s too much competition in schools anyway, and it defeats the purpose of Dodecahedron Day to have a student who is genuinely proud of his model to leave the day thinking, “Mine was really nice, but hers was better. The teacher said so.”

The great thing is that once students learn basic model-making skills, they can search the internet for printable nets of almost any polyhedron they can think of. Pieces can be made from different colors, and particular color arrangmements of pieces can create really beautiful models.

Another reason for writing about Dodecahedron Day a bit early is that it really takes some planning. If a school or school district wants to set aside December 5 for activities, it’s best to make that decision before the school year starts — otherwise there may be time pressure to coordinate with course syllabi, school leadership and other teachers. Further, if teachers want to take their students to other schools so that their students can teach younger pupils how to build models, it helps to develop relationships with local schools if they don’t already exist. I can tell you from experience, the earlier you start, the better.

So if you’re a student reading this, ask your teacher to celebrate Dodecahedron Day this year! If you’re a teacher or school principal, think about it — and feel free to comment with questions, concerns, or ideas. I’m happy to help in any way I can.

And if you’re not from the US, consider introducing Dodecahedron Day into schools in your country! You’ll notice the title of today’s post — I’m hoping to make Dodecahedron Day 2016 an international event, and I can’t do it alone. Perhaps materials need to be translated, or simply reformatted for A4 paper…. By starting early, it’s possible to create an enjoyable experience for everyone involved.

So in anticipation, Happy Dodecahedron Day 2016! Let’s make this a day to introduce a passion for geometry to students all around the world!

Day028dd_ppl_pic1Web

Creating Fractals IV: Results!

It has been a while since I wrote about making fractal images — and you might recall that  I made several observations about how the images were drawn, but didn’t actually prove that these observations were valid in any general sense.

That has changed!  A few weeks ago, I decided that it was time to bite the bullet.  I had a concise way to describe what angles were chosen (see Creating Fractals, Day008, and Creating Fractals II:  Recursion vs. Iteration, Day009), I accumulated a lot of empirical evidence that validated this description, and now it was time to prove it.  I made a goal of solving the problem by the end of this semester.

It is amazing what a little determination can do!  I went back to the code I wrote last October, stared at and studied countless sequences of angles and their corresponding images, and within a few days had a working hypothesis.  Less than a week had gone by before I had a fairly complete proof.  What I thought would take me an entire semester took me about a week.

In today’s post, I’ll talk about specific cases which directly relate to my previous blog posts.  I won’t really prove anything here, but instead present the idea of the proof.  When I write up the complete proof, I’ll post a link to the paper.

The main insight came from looking at sums of angles (mod 360).  Let’s look at a specific example, using angles of 40 degrees and 60 degrees (both counterclockwise).  These angles produce the following image:

Day027fractal_40_60_1

The angle sequence follows the pattern described in Creating Fractals II:  40, 60, 40, 40, 40, 60, etc., where the “40” occurs in position k if the highest power of 2 which divides k is even, and “60” occurs if this power is odd.

The arms in this figure have eight segments each; one such arm is highlighted below.

Day027fractal_40_60_2

Now let’s write the angle sums, starting with 0 since the first segment starts at the center and moved directly to the right.  We get

Day027Table

The numbers at the top and left are for row/column reference only.  We begin with 0, and 40, then add 60 to get 100, then add 40 more to get 140, etc.  Once we hit 320 and need to add 60, we write 20 instead of 380 (since as far as angles go, 20 and 380 are equivalent).  This is essentially saying that we are adding angles mod 360 (that is, using modular arithmetic).

These angle sums are the actual directions the lines are being drawn in the plane.  You should be able to see the first two rows of this table clearly in the previous image — as you go around the first arm, your direction changes and points in the direction indicated by the appropriate sum in the table.

But notice the following interesting fact:  each sum in Row 2 is exactly 180 degrees more than the corresponding sum in Row 1!  What this means is as follows:  once the first four segments are drawn, the next four are drawn pointing in the opposite directions.  In other words, they geometrically “cancel out.”  This means that after the first two rows, you’ll return to the origin (as seen above).

You can continue to follow along in the table and view the next arm being drawn, as shown below.

Day027fractal_40_60_3

This might seem “obvious” by looking at the table — but it is only obvious after you know how to draw the table.  Then it’s easy!  Even the mathematics is not all that difficult.   I can’t emphasize enough, though, how using the computer to look at several (and more!) examples was a tremendous help in making progress towards how to arrange the table.

Now look at the “20” underlined at the beginning of Row 5.  Because of the recursive pattern of the angles, this means that the next eight segments drawn will exactly repeat the second arm.

Just when do the arms repeat?  The underlined angles (which indicate the direction the next eight segments are starting off) are the beginning of the sequence

0, 20, 20, 40, 60, 80, 80, 100, 100, 120, ….

If we look at the successive differences, we obtain the sequence

20, 0, 20, 20, 20, 0, 20, 0, 20, ….

But notice that this is the same pattern as the sequence of angles:

40, 60, 40, 40, 40, 60, 40, 60, 40, …

This means that the same pattern which indicates which angle to choose also determines which arms are redrawn.  Really amazing!

The separation of 20 degrees between arms is just 60 – 40.  In general, if d is the difference between the two angles, you need to take the greatest common divisor of d and 360, which is often abbreviated gcd(d, 360).  But in this case, since 20 is already a factor of 360, you get the difference back.

Once you know the arms are separated by 20 degrees, you know that there are 360/20 = 18 arms in the final image.

As I mentioned, it is possible to prove all this — and more.  Although we looked at a specific case, it is possible to make generalizations.  For example, there were 8 segments in each arm — and 8 is a power of 2 (namely 3).  But other powers of two are possible for the number segments in arms — 4, 32, 64, etc.

In addition, there is nothing special about degrees.  Why divide a circle into 360 equal parts?  You can divide the circle into a different number of parts, and still obtain analogous results.

The number of interesting images you can create, then, is truly astonishing.  But the question still remains:  have we found them all?  In addition to all the images obtained by looking at arms whose segments number a power of two, it is possible to obtain more regular figures.

Day027fractal_40_60_4

Such images are obtained when both angles are the same.  But other than this, I haven’t found any other types of figures.

So are there any others?  Maybe.  Maybe not.  That’s part of the fun of doing mathematics — you just never know until you try.  But I think this question will be a bit harder to answer.  Is some enthusiastic reader tempted to find out?  Perhaps all it takes is a little determination….

On Grading

A few weeks ago, I posted a short satire on how I view one of the most common ways of assigning grades — taking points off for mistakes, and determining students’ grades by how many points are left.  Today, I’d like to take a more practical look, as well as describe a system I currently use in my teaching.

I can recall two events which started  me thinking more critically about grading practices. The first was a letter to the editor written in a mathematics journal.  The university professor described a final exam in a differential equations course — ten questions, worth ten points each.  To his dismay, no student earned ten points on any problem.  They got by with partial credit.

So he thought he’d try the following grading scheme:  no partial credit.  Each question was either correct (10 points) or incorrect (0 points).  To his surprise, the course average didn’t change significantly — students actually were much more careful because they knew the stakes were high.

Second, when teaching multiple-section precalculus courses at the high school level, I would need to give the same exams as my colleagues.  We’d sit around and ask questions like “How many points off for a sign error?”  “What if they just make a minor arithmetic mistake?”  We’d try to make sure everyone graded pretty much the same.  We’d even talk at the (insane) level of half-points….

So when developing an honors-level calculus course (at the high school level), I thought I’d try something different.  First, I separated exams into two sections:  Skills and Concepts.  And second, I’d grade problems as Completely Correct (CC), Essentially Correct (EC) — meaning a student knew how to approach a problem, but had significant issues in following through, or not correct (X) — indicating lack of a viable solution strategy.

I’d then assign a letter grade based on the CC/EC distribution.  This is along the lines of the university professor’s thought — you can’t earn an A if you don’t have a certain number of problems Completely Correct.  In other words, a student must demonstrate significant mastery in solving problems, not just get by on partial credit.

I do know of professors who use a “2–1–0” scheme — and this is certainly similar.  Assigning a CC 2 points, an EC 1 point, and an X zero points can help in giving an approximate idea of where a student stands.  But I also use grades of CC- (perhaps more than a few arithmetic errors), EC+ (almost CC), and EC- (got the right idea, but just barely).  If a lot of the EC’s are in fact EC+’s, I might bump the grade up a notch.

I also differentiate between Skills and Concepts questions.  Skills questions are more-or-less textbook problems — routine, checking that a student knows the mechanics.  They are relative short, although I might sometimes assign two CC/EC/X grades if the problem is a little more involved.

I purposely avoid problems which scaffold in the Skills section.  For example, if you want to assess integration by parts through a volume problem, and the student sets up the volume integral incorrectly, then you may not be able to assess their ability to perform integration by parts.  I address this issue by writing two separate Skills questions:  first, a “set up but do not evaluate” volume problem, and an integration by parts problem.  I don’t feel anything is lost here.

The Concepts questions are intended to assess whether students really have some conceptual understanding.  They are typically open-ended, and require some argument (though a formal proof is not necessary in calculus).  As an example, here is a Concepts problem from a Calculus II exam given last semester:

For each of the following statements, either justify why it is true, or give a counterexample to show that it is false.

(1) If \displaystyle\sum_{n=0}^\infty |a_n| and \displaystyle\sum_{n=0}^\infty |b_n| converge, then \displaystyle\sum_{n=0}^\infty |a_n+b_n| converges.

(2) If \displaystyle\sum_{n=0}^\infty |a_n+b_n| converges, then both \displaystyle\sum_{n=0}^\infty |a_n| and \displaystyle\sum_{n=0}^\infty |b_n| converge.

This is certainly a non-routine question.  As such, I grade Concepts problems more leniently, assigning an EC if it seems that a student has shown some insight into the problem.

On this 65-minute exam, there were seven Skills problems and four Concepts problems.  To earn an A, a student needed 5 CC and 3 EC.  The 5 CC meant that there had to be significant Skills mastery.  But note that if an A student earned at least an EC on all the Skills problems (which they should certainly do), they only needed to make progress on one of the four Concepts problems to earn an A.

I try to design the Skills part so that it takes about 45–50 minutes to complete, leaving 15–20 minutes to think about one (or more) Concepts problem(s).  And as the grading scheme implies, some progress needs to be made on the Concepts problems to earn an A, which is as it should be — an A student should be able to demonstrate some level of conceptual understanding.

Further, I might bump up the grade if a student can make progress on more than one Concepts problem, or perhaps gets one CC (which does not occur all that often in my classes).

I’ve been using this scheme for about seven years now, and I like it.  Grading is more pleasant (no agonizing over points), students rarely argue about EC/CC (it’s not that fine a distinction), and I can count on one hand (with fingers left over) the number of students who have argued about the assignment of a letter grade.  What’s also nice about this scheme is that it’s easy to adjust for exams which are (inadvertently) too difficult — just relax the requirements needed for an A.

Now to some extent, this may seem highly subjective.  But I maintain that it is no more subjective than assigning points.  Precisely how are those assignments made?  If a quotient rule problem is worth 10 points and the student switches the order of the terms on the numerator, is it 1 point off?  2 points?  Maybe 3?  How many “tenths” of the 10-point problem is the order of the terms on the numerator worth, anyway?  It’s truly an arbitrary decision.

A point-based system does suggest that problem-solving can be broken down into separate chunks which can be assembled to make a whole — something mathematicians know to be ridiculously hard to quantify, if it is possible at all.

Now I do admit to giving point-based exams in courses like Business Statistics — a 13-section course of which I taught two sections last semester.  I had almost 50 students, and the course is essentially a skills-oriented course.  Like any other teaching strategy, a grading style may seem more appropriate in one context than another.

So I am not advocating a “one size fits all” grading practice here.  My intent is to suggest that there are successful alternatives to a strictly point-based grading system.  And while every system has its drawbacks, I believe that one of the main strengths of the system described in this post lies in the ability to meaningfully assess conceptual understanding — something I have found virtually impossible in a point-based system.