It has been a while since the last installment of On Coding. I realized there is still more to say about computer graphics; I mentioned the graphics package POV-Ray briefly in On Coding IX, but feel it deserves much more than just a mere mention.
I’d say I began using POV-Ray in the late 1990’s, though I can’t be more precise. This is one of the first images I recall creating, and the comments in the file reveal its creation date to be 19 September 1997.
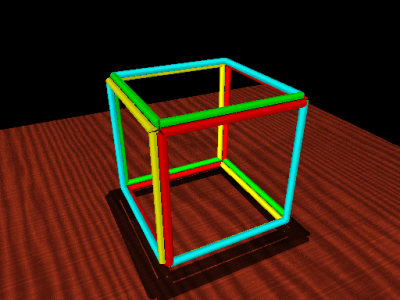
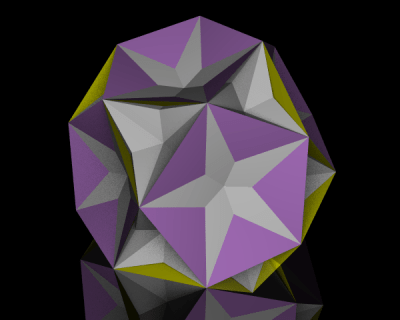
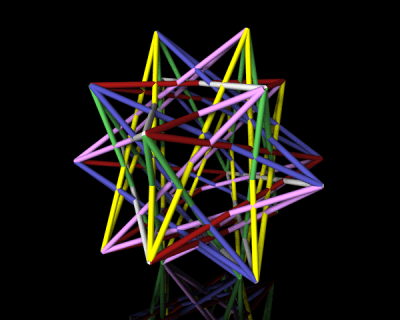
Not very sophisticated, but I was just trying to get POV-Ray to work, as I (very vaguely) remember. Since then, I’ve created some more polished images, like the polyhedron shown below. I’ll talk more about polyhedra in a moment….
First, a very brief introduction. POV-Ray stands for Persistence of Vision Raytracer. Ray tracing is a technique used in computer graphics to create amazingly realistic images. Essentially, the color of each pixel in the image is determined by sending an imaginary light ray from a viewing source (the camera in the image below) and seeing where it ends up in the scene.

It is possible to create various effects by using different light sources, having objects reflect light, etc. You are welcome to read the Wikipedia page on ray tracing for more details on how ray tracing actually works; my emphasis here will be on the code (of course!) I wrote to create various three-dimensional images. And while the images you can produce using a ray tracing program are quite stunning at times, there is a trade-off: it takes longer to generate images because the color of each pixel in the image must be individually calculated. But I do think the results are worth the wait!
My interest in POV-Ray stemmed from wanting to render polyhedra. The images I found online indicated that you could create images substantially more sophisticated than those created with Mathematica. And better yet, POV-Ray was (and still is!) open source. That means all I needed to do was download the program, and start coding….
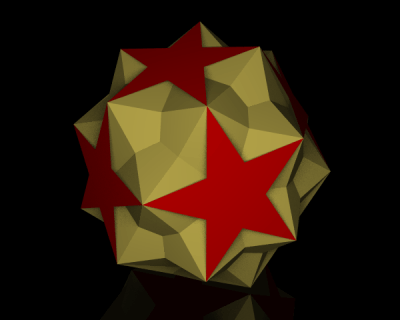
POV-Ray is a procedural programming language all in itself. So to give you an idea of what a typical program looks like, I’ll show you the code which makes the following polyhedron:
Here’s how it begins.
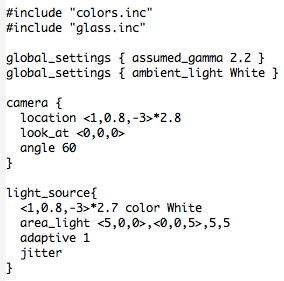
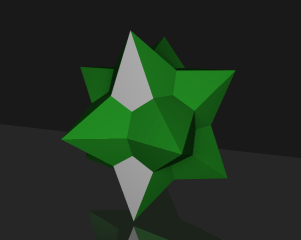
The #include directive indicates that the given file is to be imported. POV-Ray has many predefined colors and literally hundreds of different textures: glass, wood, stone, gold and other metals, etc. You just include those files you actually need. To give you an idea, here is the logo I created for Dodecahedron Day using silver and stone textures.
![]()
Next are the global settings. There are actually many global settings which do a lot more than I actually understand…but I just used the two which were included in the file I modeled my code after. Of course you can play with all the different settings (there is extensive online documentation) and see what effects they have on your final image, but I didn’t feel the need to. I was getting results I liked, so I didn’t go any further down this path.
Then you set the camera. This is fairly self-explanatory — position the camera in space, point it, and set the viewing angle. A fair bit of tweaking is necessary here. Because of way the image is rendered, you can’t zoom in, rotate, or otherwise interact with the created image. So there is a bit of trial-and-error in these settings.
Lighting comes next. You can use point light sources in any color, or have grids of light sources. The online documentation suggested the area lighting here (a 5-by-5 grid of lights spanning 5 units on the x-axis and 5 units on the z-axis), and it worked well for me. Since I wanted the contrast of the colors of the faces of the polyhedra on a black background, I needed a little more light than just a single point source. You can read all about the “adaptive” and “jitter” parameters here, but I just used the defaults suggested in the documentation and my images came out fine.
There are spotlights and cylindrical lighting sources as well, and all may be given various parameters. Lighting in Mathematica is quite a bit simpler with fewer options, so lighting was one of the most challenging features of POV-Ray to learn how to use effectively.
So that’s the basic setup. Now for the geometry! I can’t go into all the details here, but I can give you the gist of how I proceeded.
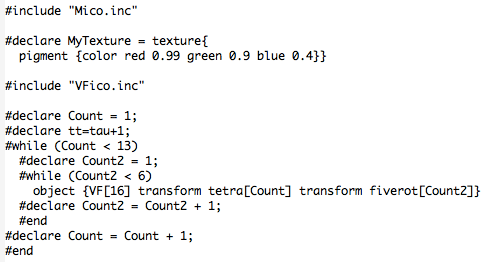
The nested while loops produce the 60 yellow faces of the polyhedron. Because of the high icosahedral symmetry of the polyhedron, once you specify one yellow face, you can use matrices to move that face around and get the 59 others.
To get the 60 matrices, you can take each of 12 matrices representing the symmetries of a tetrahedron (tetra[Count]), and multiply each by the five matrices representing the rotations around the vertices of an icosahedron (fiverot[Count2]). There is a lot of linear algebra going on here; the matrices are defined in the file “Mico.inc”, which is included.
The vertices of the yellow faces are given in “VF[16]”, where the “VF” stands for “vertex figure.” These vertex figures are imported from the file “VFico.inc”. Lots of geometry going on here, but what’s important is this: the polygon with vertices listed in VF[16] is successively transformed by two symmetry matrices, and then the result is defined to be an “object” in our scene. So the nested loops place 60 objects (yellow triangles) in the scene. The red pentagrams are created similarly.

Finally, the glass tabletop! I wanted the effect to be subtle, and found that the built-in texture “T_Glass2” did the trick — I created a square (note the first and last vertices are the same; a quirk of POV-Ray) of glass for the polyhedron to sit on.
POV-Ray does the rest! The overall idea is this: put whatever objects you want in a scene. Then set up your camera, adjust the lighting, and let POV-Ray render the resulting image.
Of course this introduction is necessarily brief — I just wanted to give you the flavor of coding with POV-Ray. There are lots of examples online and within the documentation, so it should not be too difficult to get started if you want to experiment yourself!

One thought on “On Coding XI: Computer Graphics III, POV-Ray”